You may be interested

Bright Light, Better Mood: The Role of Light Therapy in Perinatal and Nonseasonal Depression
March 19, 2026


 Dr Tim Pearce
You’ve just completed a lip procedure, the patient looks great and leaves happy. Two days later, they message you about a lump. Sound familiar?
Lumps after lip procedures are actually relatively common and are one of the most frequent follow-ups you’ll encounter in aesthetic practice, affecting both patients and clinicians at some point in their experience with dermal fillers. Most are straightforward to resolve once you understand what’s causing them.
The challenge lies in accurate diagnosis. A lump that appears on day two requires a completely different response than one that emerges three months post-treatment. Understanding the underlying cause determines whether you’ll resolve the issue with gentle massage, medical intervention, or simply time.
The Three Types of Lumps You’ll Encounter
Not all lip filler bumps are created equal. Before you can treat them effectively, you need to identify which type you’re dealing with.
Procedural Lumps (Hematomas and Bruising)
The needle itself can cause tissue trauma. When you insert a needle into the lip tissue, you may create a small bruise or hematoma that presents as a lump. These tend to resolve on their own within days.
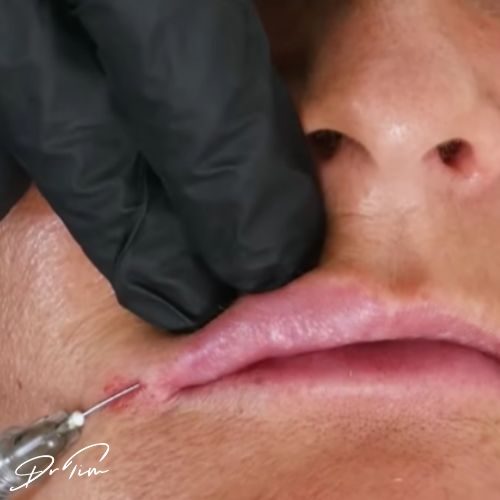
The key identifier: they’re tender when touched. This tenderness differentiates them from other types of lumps you might encounter.
Filler Bolus Lumps (Non-Inflammatory Lesions)
This second category involves visible or palpable filler deposits that bother the patient. Think of it as a concentrated pocket of product sitting in the tissue. The patient can either see it or feel it, creating an aesthetic concern.
These non-inflammatory lumps respond well to treatment because they’re essentially just filler that hasn’t integrated properly. If you think about the mechanics, it’s a lump of filler sitting in tissue. You should be able to massage the area until it softens and blends into the surrounding tissue. The filler material itself isn’t causing inflammation or immune response. It simply needs proper integration.
Many procedures create a combination of post-injection swelling plus newly placed filler that hasn’t fully settled yet. The tissue is still responding to the procedure itself. Sometimes the cure is just time as the swelling resolves and the filler naturally integrates over the first week or two.
Inflammatory Lumps (Infection or Reactions)
The third type requires a different approach entirely. These lumps grow over time and need a medical response. Watch for lumps that increase in size, particularly if they’re asymmetrical with redness around them.

This could signal the start of an infection, an established infection, or a reaction to the product.
Reactions typically cause the rest of the lip to swell up as well. The product can create very lumpy tissue when it reacts with the immune system.
How to Prevent Non-Inflammatory Lesions
The biggest preventive measure you can take happens before the patient leaves your clinic. After completing the procedure, do a gentle check for any lumps or bumps you can feel that day.
Here’s why this matters: if you leave a large bolus of filler in place, it tends to attract moisture and becomes firmer over the next few days. Massage before the patient leaves and you’ll decrease the number of follow-ups dramatically.
The technique matters here. “Smooth it, don’t move it” should be your mantra. Use a gentle squeeze that respects the shape of the lip you’re trying to create. You want to gently integrate the filler into the lip tissue rather than squashing it around. This approach should reduce non-inflammatory lump follow-ups significantly.
How to Reduce Inflammatory Lesions
Prevention of inflammatory nodules comes down to injection technique and clinical hygiene.
Keep the lip area as clean as possible during the procedure. This seems obvious, but it’s worth emphasizing. Anything that seals in bacteria might create problems down the line.
Advise patients not to apply makeup immediately after treatment, particularly makeup that isn’t sterile. The same principle applies: you don’t want to trap potential pathogens against the injection sites.
Consider reducing your entry points. Each needle insertion creates a potential pathway for bacteria to enter. The fewer entry points you make, the lower your infection risk.
Schedule lip procedures strategically. Avoid doing them on days when you’re performing other procedures, particularly dental work. The more bacteria enters the bloodstream around the patient’s head, the more likely some of those bacteria may settle onto filler deposits. This can lead to inflammatory lumps and bumps caused by bacteria, which are the hardest type to treat.
Your Treatment Approach Based on Lump Type
Once you’ve identified the type of lump, you can apply the appropriate intervention.
For post-procedural swelling lumps, give them time. If you think the lump stems from normal tissue response and swelling, patience often resolves the issue without intervention.
For filler bolus lumps, massage works well. When you’ve determined the lump is due to filler placement or a large bolus that’s distracting for the patient, gentle massage should integrate the product. Remember the technique: smooth, don’t move.
For inflammatory lumps, you need to treat the medical causes. Whether dealing with infection or allergic reaction, these require appropriate medical intervention. Don’t try to massage away an inflammatory response.
When to Consider Hyaluronidase
After trying light touch interventions like massage and time, you have one final option: dissolving the lumps with hyaluronidase.
This is your sledgehammer, so try not to reach for it immediately. You want to avoid going straight to dissolving on day two or three after a procedure, even if the patient expresses strong dissatisfaction with a lump they’re experiencing. Give these lumps time first.
Here’s why patience matters: many lumps stem from hematomas and swelling rather than the filler itself. There’s no guarantee that reversing the filler will eliminate a lump if the underlying cause is bruising or tissue trauma. You might dissolve perfectly placed filler and still have a lump from the hematoma. Or you might create a different type of lump through the dissolution process itself.
Work your way through the interventions with light touch first. Start with observation if you suspect post-procedural swelling. Move to massage if you’ve identified a filler bolus. Only escalate to more drastic measures once you’ve gone through the process systematically and established that gentler approaches won’t resolve the issue.
Building Your Intervention Sequence
You should have a systematic approach to dealing with lumps and bumps. Apply interventions sensibly, doing the minimal intervention necessary.
Most patients return to a happy state within the first or second visit when you follow this framework. Start with the least invasive option. Assess the response. Escalate only when needed.
Improving Your Outcomes Over Time
The more you think about lip filler complications and refine your injection technique and post-procedure massage, the fewer lumps you should encounter over time. They’ll never reach zero, though. Lumps remain a common side effect after lip procedures, no matter your skill level.
This is normal and expected. Don’t aim for perfection or beat yourself up when lumps occur. Instead, aim for competent identification and systematic treatment of the lumps that do appear. Your goal should be reducing the frequency while improving your response when they do happen.
Your technical skills will improve with each case. Every patient teaches you something about product placement, individual tissue response, and the variations between patients. Some patients retain more fluid. Some have thinner lip tissue. Some naturally develop more post-procedural swelling. Pay attention to these patterns.
Review your own practice regularly. Which techniques in your hands create more follow-ups? Which create fewer? Which patients tend to develop lumps, and what do they have in common? Adjust your approach accordingly. This self-reflection and adaptation separates practitioners who continually improve from those who repeat the same complications indefinitely.

Dr Tim Pearce eLearning
Dr Tim Pearce MBChB BSc (Hons) MRCGP founded his eLearning concept in 2016 in order to provide readily accessible BOTOX® and dermal filler online courses for fellow Medical Aesthetics practitioners. His objective was to raise standards within the industry – a principle which remains just as relevant today.
Our exclusive video-led courses are designed to build confidence, knowledge and technique at every stage, working from foundation level to advanced treatments and management of complications.
Thousands of delegates have benefited from the courses and we’re highly rated on Trustpilot. For more information or to discuss which course is right for you, please get in touch with our friendly team.
Dermal Filler & Lips eLearning Courses
If you want to increase your knowledge about safe and effective lip filler injectable treatments, Dr Tim Pearce offers a series of fabulous courses, from foundation and upwards:
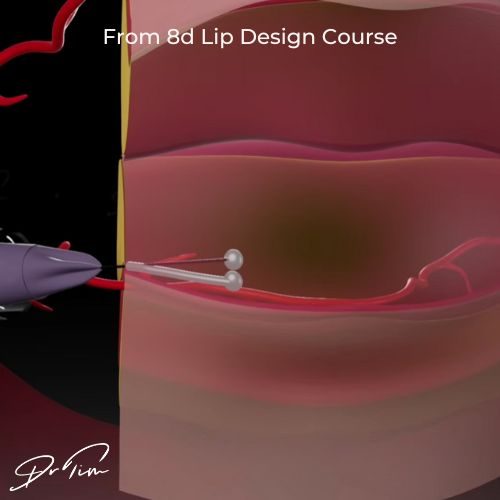
- 8D Lip Design
- Elective Lip Reversal
- Dermal Fillers Foundation Course
- Dermal Filler Complications Mastery
In addition, browse our FREE downloadable resources.